Are you dreaming of a stunning, personalized bridal look for your special day? Look no further than creating your very own hair vine! In this guide, we’ll show you step-by-step how to craft a beautiful, custom hair vine. This will elevate your wedding day hairstyle. Whether you’re a DIY enthusiast or a bride-to-be on a budget, this tutorial will help you achieve a professional-looking hair accessory at a fraction of the cost.
Key Takeaways
- Learn how to make a stunning DIY hair vine for your wedding day
- Discover the benefits of creating your own hair vine
- Gather the essential materials and tools needed for a DIY hair vine
- Follow a step-by-step guide with detailed instructions and pictures
- Explore styling tips and hairstyles for wearing your handmade hair vine
What is a Hair Vine?
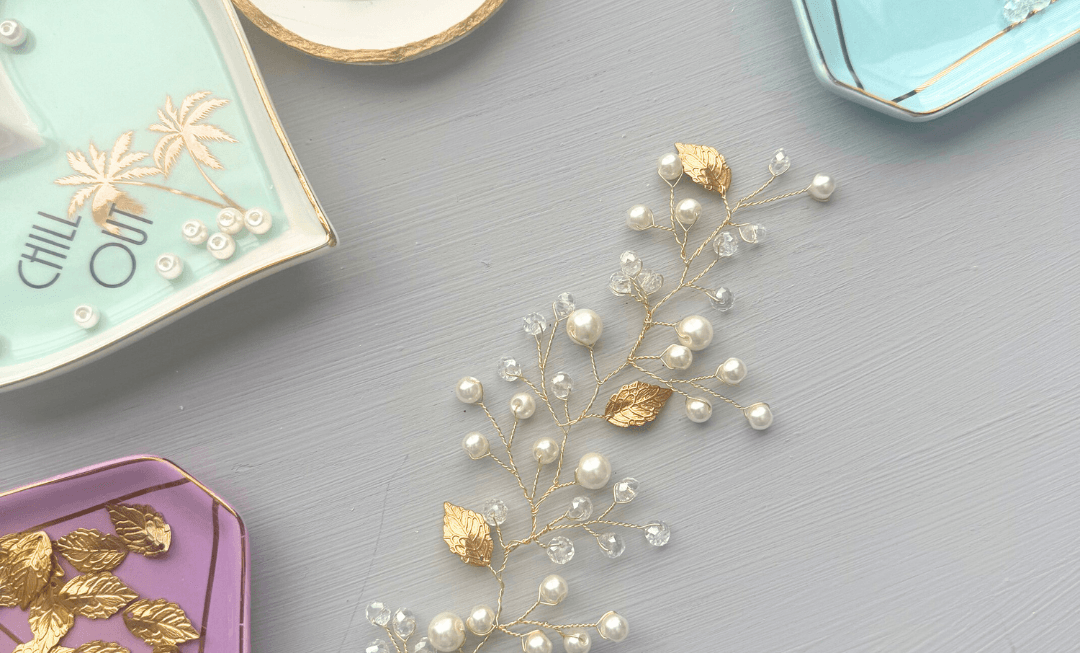
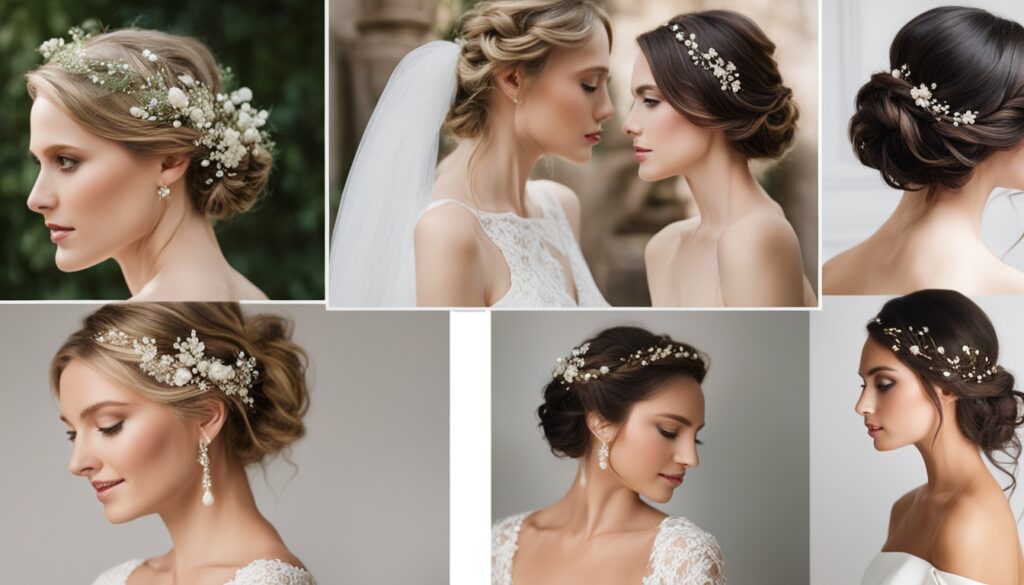
A hair vine is a delicate, vine-like hair accessory for brides. It’s made of wire, beads, crystals, or other decorations. These accessories are woven, twisted, or pinned into the hair. They add elegance and romance to any hairstyle, making them perfect for weddings and special events.
Definition and Purpose of Hair Vines
The term “hair vine” comes from their vine-like look and structure. These accessories are designed to be woven into different hairstyles. They add a whimsical and glamorous touch to a bride’s look on her big day.
Hair vines are versatile and can be worn in many ways. They can be a single strand or a full design. They work well with other bridal accessories like tiaras and headbands, making the look complete and stunning.
| Hair Vine Definition | Purpose of Hair Vines |
|---|---|
| A delicate, vine-like hair accessory made of wire, beads, crystals, or other decorative elements | Add elegance and romance to bridal hairstyles Secure and embellish the hair Complement other bridal hair accessories Versatile for various hairstyles and occasions |
Benefits of Making Your Own Hair Vine
Making your own hair vine has many perks. You can tailor the design to fit your style and wedding theme. This makes it a special and unique hair accessory. It’s perfect for brides wanting a personal touch in their look.
Another plus is it can save you money. Instead of buying a pricey hair vine, you can make one yourself. You just need to find the materials and use your creativity. This way, you get a quality hair vine that matches your wedding outfit without spending a lot.
Plus, making your own hair vine is fun and fulfilling. It lets you be creative and try out new things. You end up with a hair piece that shows off your unique style. This is great for brides who love handmade items and the personal touch they bring.
- Customized design to match your personal style and wedding theme
- Cost-saving alternative to pre-made hair vines
- Opportunity to tap into your creativity and develop a unique accessory
If you like DIY projects or want a personal and affordable bridal hair accessory, making your own hair vine is a great idea. With the right materials and some creativity, you can create a beautiful hair piece. It will be the perfect addition to your wedding day look.
Materials Needed for a DIY Hair Vine
Making your own hair vine for a wedding or special event is easy with the right hair vine supplies and tools. Whether it’s for a bridal hair piece or DIY hair accessories, having the right materials makes the project smooth and successful.
Essential Supplies and Tools
Here are the basic items you’ll need for a hair vine:
- Flexible wire, like jewelry or floral wire, in the right length and thickness
- Beads, crystals, pearls, or other decorations for sparkle and texture
- Pliers for shaping and handling the wire
- Wire cutters to cut the wire to the right size
- Sharp scissors for cutting materials like ribbons or fabrics
You might also need these for your wedding hair piece materials and the look you want:
- Ribbons or lace to wrap around the wire
- Small flowers, leaves, or other floral pieces
- Glue or wire connectors to keep the decorations in place
Having all your supplies for a DIY hair vine ready before you start makes the project fun and stress-free. This way, you can focus on making a beautiful, personalized hair accessory.
“The key to a successful DIY hair vine project is having all the right materials on hand and taking the time to plan your design.”
Step-by-Step Guide to Creating a Hair Vine
Are you ready to unleash your creativity and craft your own stunning hair vine? Get ready to transform simple materials into a beautiful bridal hair accessory. In this detailed tutorial, we’ll guide you through the step-by-step process of making your very own DIY hair vine.
Shaping the Wire Base
Start by selecting a flexible wire, such as floral wire or jewelry wire. Cut a length that will comfortably wrap around your head, allowing for some overlap. Gently bend and shape the wire into a loose vine-like form, creating gentle curves and loops to mimic the natural flow of a hair vine.
- Measure the wire to fit your head comfortably, leaving a few inches for overlap.
- Use your fingers to carefully shape the wire into a flowing, organic shape.
- Ensure the wire maintains its flexibility, as you’ll need to adjust it later during assembly.
Adorning the Hair Vine
Now it’s time to add the decorative elements that will bring your bridal hair accessory to life. Gather your choice of beads, pearls, crystals, or other small embellishments. Carefully attach them to the wire base using a small amount of glue or thin wire.
- Select your preferred decorative elements, such as pearls, crystals, or small flowers.
- Attach the embellishments securely to the wire base, using a small amount of glue or thin wire.
- Arrange the decorations in a visually appealing and balanced manner.
Remember to let the glue dry completely before moving on to the next step.
Assembling the Final Hair Vine
Once the decorative elements are in place, it’s time to finalize the assembly. Gently adjust the wire shape as needed to ensure a comfortable and secure fit on your head. Attach the two ends of the wire together, either by overlapping them or using a small clasp or connector.
- Fine-tune the wire shape to fit your head comfortably.
- Securely attach the two ends of the wire together, ensuring a stable and secure fit.
- Add any final touches, such as additional embellishments or a decorative clasp.
Congratulations! You’ve now created your very own wedding hair piece DIY – a stunning and personalized hair vine that will elevate your bridal look.
Hair Vine How to do
Making a beautiful hair vine for your big day is easy with the right tools and a bit of creativity. You can make a lovely bridal hair accessory yourself. Our tutorial is here to help, whether you’re new to crafting or a pro. Follow our steps to create a wedding hair piece that matches your style perfectly.
Shaping the Wire Base
Start with the wire base of your hair vine. Pick a flexible wire like floral or jewelry wire. Bend it into the shape you want, like a spiral or a vine. Try out different shapes to see what suits your hair and style best.
Embellishing the Hair Vine
After shaping the wire, add your decorations. Use beads, crystals, pearls, or other small items to decorate your DIY hair vine. Attach them to the wire with glue, wrapping, or jump rings. Make sure they’re evenly spaced and match the wire’s shape.
Securing the Hair Vine
To finish, attach the hair vine to your hair. Use bobby pins, hair clips, or a thin wire to secure it. Try different ways to see what looks best and stays in place.
“Crafting your own hair vine allows you to create a truly unique and personalized bridal hair accessory that reflects your individual style and vision.”
With our DIY hair vine instructions and some creativity, you can turn simple wire into a beautiful wedding hair piece. This will boost your confidence and make your day special.
Styling Tips for Wearing a Hair Vine
Styling your handcrafted hair vine opens up endless possibilities. Whether it’s for a wedding, a special event, or just to add elegance to your daily look, these tips will help you shine. They’ll show you how to make the most of your unique hair accessory.
Hairstyles and Occasions for Hair Vines
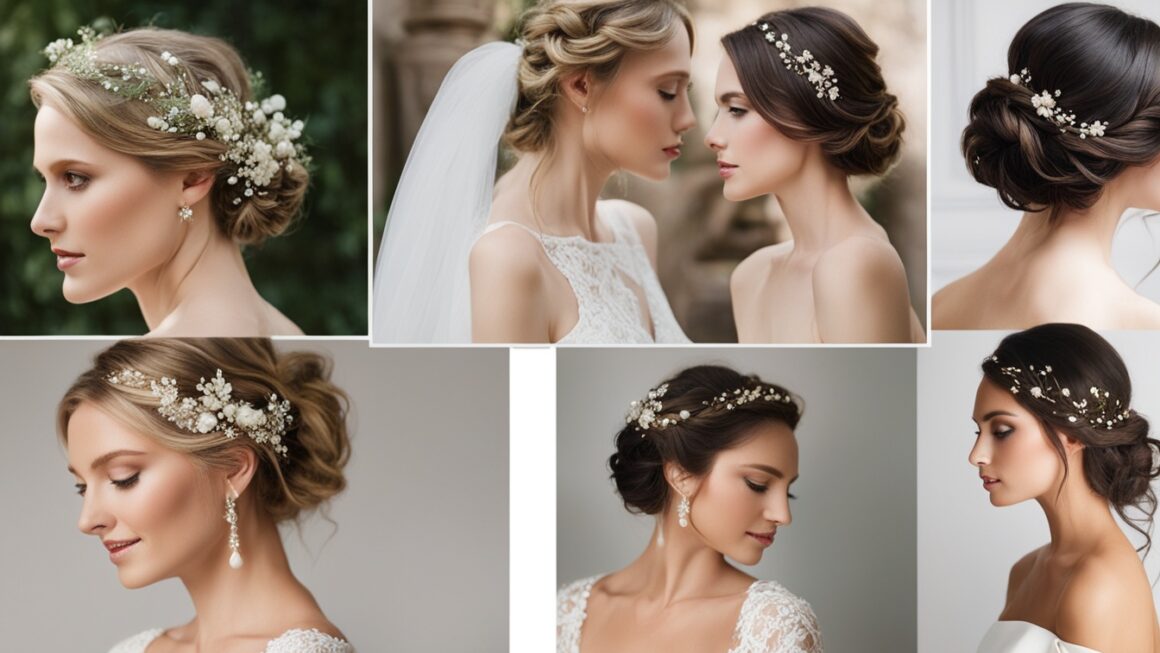
Hair vines are super versatile and fit into many hairstyles. They work well with classic updos, intricate braids, romantic waves, and sleek chignons. They’re especially loved for bridal hair vine styles and wedding hair accessory ideas. They add a magical touch to the bride’s big day.
Here are some tips on how to wear hair vine:
- Weave the hair vine through a low bun or chignon for a timeless, elegant look.
- Wrap the vine around a messy updo or half-up, half-down hairstyle for a bohemian-inspired vibe.
- Tuck the vine into a side-swept style or cascading waves for a romantic, hairstyles with hair vines effect.
- Incorporate the vine into a classic French braid or intricate fishtail braid for a touch of whimsy.
No matter the event, a hair vine can make your look pop. It adds a touch of bridal hair vine styles sophistication to any hairstyle.
“A hair vine is the perfect accessory to add a touch of ethereal elegance to any hairstyle, whether you’re walking down the aisle or attending a special event.”
Caring for Your Handmade Hair Vine
Looking after your handmade hair vine is crucial to keep it beautiful. Whether it’s for your wedding or you want to keep it for years, these tips will help. They ensure your DIY hair accessory stays in top shape.
Storing Your Hair Vine
Proper storage is key when your hair vine is not being worn. Keep it in a cool, dry spot, away from sunlight and moisture. A jewelry box or case can protect it from damage.
Cleaning and Maintenance
Clean your hair vine with a soft, microfiber cloth. Don’t use harsh chemicals or rough materials, as they can harm it. If you need to clean it, use mild soap and water, then dry it well.
| Maintenance Tip | Frequency |
|---|---|
| Gently wipe with a microfiber cloth | After each wear |
| Use a mild soap and water solution | As needed |
| Store in a jewelry box or case | When not in use |
By following these easy steps, your handmade hair vine will stay beautiful. It will be ready to wear and admire for many years.
Remember, taking good care of your DIY hair accessory is important. With these tips, you can enjoy your handmade hair vine for a long time, even after your wedding.
Customizing Your Hair Vine Design
Making your own customized hair vine lets you match it to your style and wedding theme. You can use different materials and colors, and even add flowers. This makes it easy to create a DIY hair accessory that’s all your own. We’ll share some new ideas and tips to help you make a bridal hair piece that shows off your style.
Unique Ideas and Inspirations
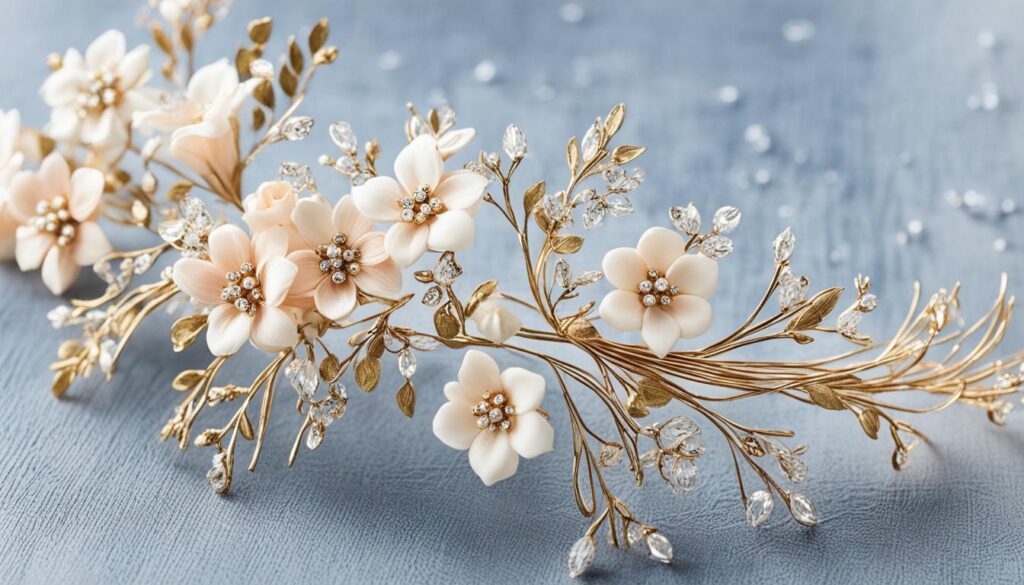
Let your creativity shine by trying out different wedding hair vine ideas. Think about adding flowers, beads, or metalwork for elegance. You can also play with colors, from soft to bold, to fit your wedding’s theme.
- Incorporate fresh or dried flowers for a natural, ethereal touch
- Embellish with delicate pearls, crystals, or other sparkling accents
- Opt for a monochromatic or ombré color scheme for a cohesive look
- Mix and match metals, such as gold, silver, or rose gold, for a unique twist
- Customize the shape and size of your hair vine to suit your hairstyle and preferences
Look at bridal magazines, Pinterest, and online galleries for inspiration. By personalizing your hair vine design, you’ll end up with a special accessory. It will make you feel confident and beautiful on your big day.
Troubleshooting Common Hair Vine Issues
Making a beautiful DIY hair vine can be fun but might have its challenges. Don’t worry if you run into problems – we’ve got solutions for you. We’ll cover common issues and how to fix them.
Bending or Breaking Wire
Wire bending or breaking is a common problem with hair vines. This often happens when shaping the vine or while wearing it. Use strong, flexible wire like jewelry or craft wire to avoid this. Be careful when bending the wire to prevent weak spots.
If a wire breaks, cut it off and reconnect the ends with more wire or jewelry glue. This way, you can fix the issue easily.
Securing Decorative Elements
Keeping flowers, beads, or other decorations in place can be hard. Use strong glue like E-6000 or hot glue to secure them. Apply a bit of glue to the base of each decoration and press it onto the wire.
You can also wrap wire around the decorations for extra hold. Be patient and take your time for the best results.
Achieving a Comfortable and Secure Fit
A hair vine that keeps slipping or feels uncomfortable is annoying. To get a good fit, try different placements and techniques. Wrap the vine around a bun or updo, or weave it through braids or twists.
Add small clips or Bobby pins to the vine’s ends for better grip. This will help keep the vine in place.
Remember these tips to overcome hair vine problems, DIY hair accessory troubleshoot, bridal hair piece fixes, or wedding hair vine solutions. With patience and practice, you’ll soon be making beautiful hair vines.
Alternative DIY Hair Accessories
Hair vines are a top pick for brides wanting something unique. But there are more DIY options out there. Discover handmade hair accessories that can make your wedding day special or add a personal touch to any event.
Floral Crowns and Headbands
Make your own DIY bridal hair accessories with a floral crown or headband. Use fresh or dried flowers, ribbons, and wire to create a beautiful piece. These wedding hair piece ideas add a romantic, whimsical feel to your look.
Handmade Hair Clips and Barrettes
For a subtle touch, try making your own hair clips and barrettes. Use lace, fabric, beads, or metal to craft unique accessories. These alternative to hair vines let you express your style on your big day or any special event.
“Embrace the beauty of handmade hair accessories and create a unique look that truly reflects your personal style.”
Let your creativity shine with DIY bridal hair accessories. Choose from floral crowns, custom headbands, or statement hair clips. These wedding hair piece ideas will make your look stand out.
Conclusion
Making your own DIY hair vine is a fun and budget-friendly way to add something special to your bridal look. This guide has shown you how to make a beautiful, unique hair accessory for your big day. It doesn’t matter if you’re new to crafting or have been doing it for years. You now have everything you need to make your own hair vine.
Get creative, enjoy making it, and feel proud to wear your DIY hair vine on your big day. This bridal hair accessory guide has given you the skills to make a gorgeous wedding hair piece that shows off your style and personality. As you start this DIY project, remember these final thoughts on hair vines for a memorable experience.
The best thing about a DIY hair vine is you can make it your own. Let your creativity flow, try out different materials and styles, and show off your unique taste. This is your chance to create a special hair accessory that will make your wedding day unforgettable.
FAQ
What is a hair vine?
A hair vine is a delicate, vine-like hair accessory for brides. It’s made of wire, beads, crystals, or other decorations. Hair vines add elegance and romance to any hairstyle, perfect for weddings and special events.
What are the benefits of making your own hair vine?
Making your own hair vine has many perks. You can tailor it to fit your style and wedding theme, making it unique. It’s also cheaper than buying one from a store or online. With the right materials and creativity, you can make a beautiful hair vine for your big day.
What materials are needed to create a DIY hair vine?
For a DIY hair vine, you’ll need wire, beads, crystals, pliers, wire cutters, and scissors. You might also need ribbons, fabric, or flowers for certain designs. Having all your materials ready will make the project go smoothly.
How do I style and wear a hair vine?
Once you’ve made your hair vine, learn how to style and wear it. We’ll give you tips for different hairstyles, from classic updos to flowing waves. Hair vines are versatile and can be worn on many occasions, making them a favorite for brides.
How do I care for my handmade hair vine?
Taking good care of your handmade hair vine will help it last. We’ll share tips on storing, cleaning, and maintaining your DIY hair accessory. These instructions will keep your hair vine looking great, even after your wedding.
How can I customize my hair vine design?
Making your own hair vine lets you personalize it to your style and wedding theme. We’ll show you how to use different materials, colors, and flowers to customize your design. With our ideas and examples, you can create a unique hair accessory that shows off your taste.
What are some common hair vine issues and how can I troubleshoot them?
Making your own hair vine might come with some challenges. We’ll talk about common problems like wire bending or breaking, keeping decorations in place, and ensuring a secure fit. Our troubleshooting tips will help you overcome these issues and achieve a stunning hair vine.